One of the biggest struggles we've seen with new CS2 server owners is setting up admin permissions on their new server. At Game Host Bros, we've made it so our panel will take care of creating all the admin and group files that are needed.
Automatically Setting Up Admins
 This is the fastest way of setting up admins in CS2. This will set all the player flags to
 @css/root and add them to the #css/admin group. In most cases, this means they will have access to everything.
- 1Make sure Enable Modding is turned on.
- 2Get the link to your Steam profile, and input it into https://steamid.io/
- 3Copy your
steamID64. - 4Log in to Bropanel and click on your CS2 server.
- 5In the sidebar, go to
Settings. - 6Look for
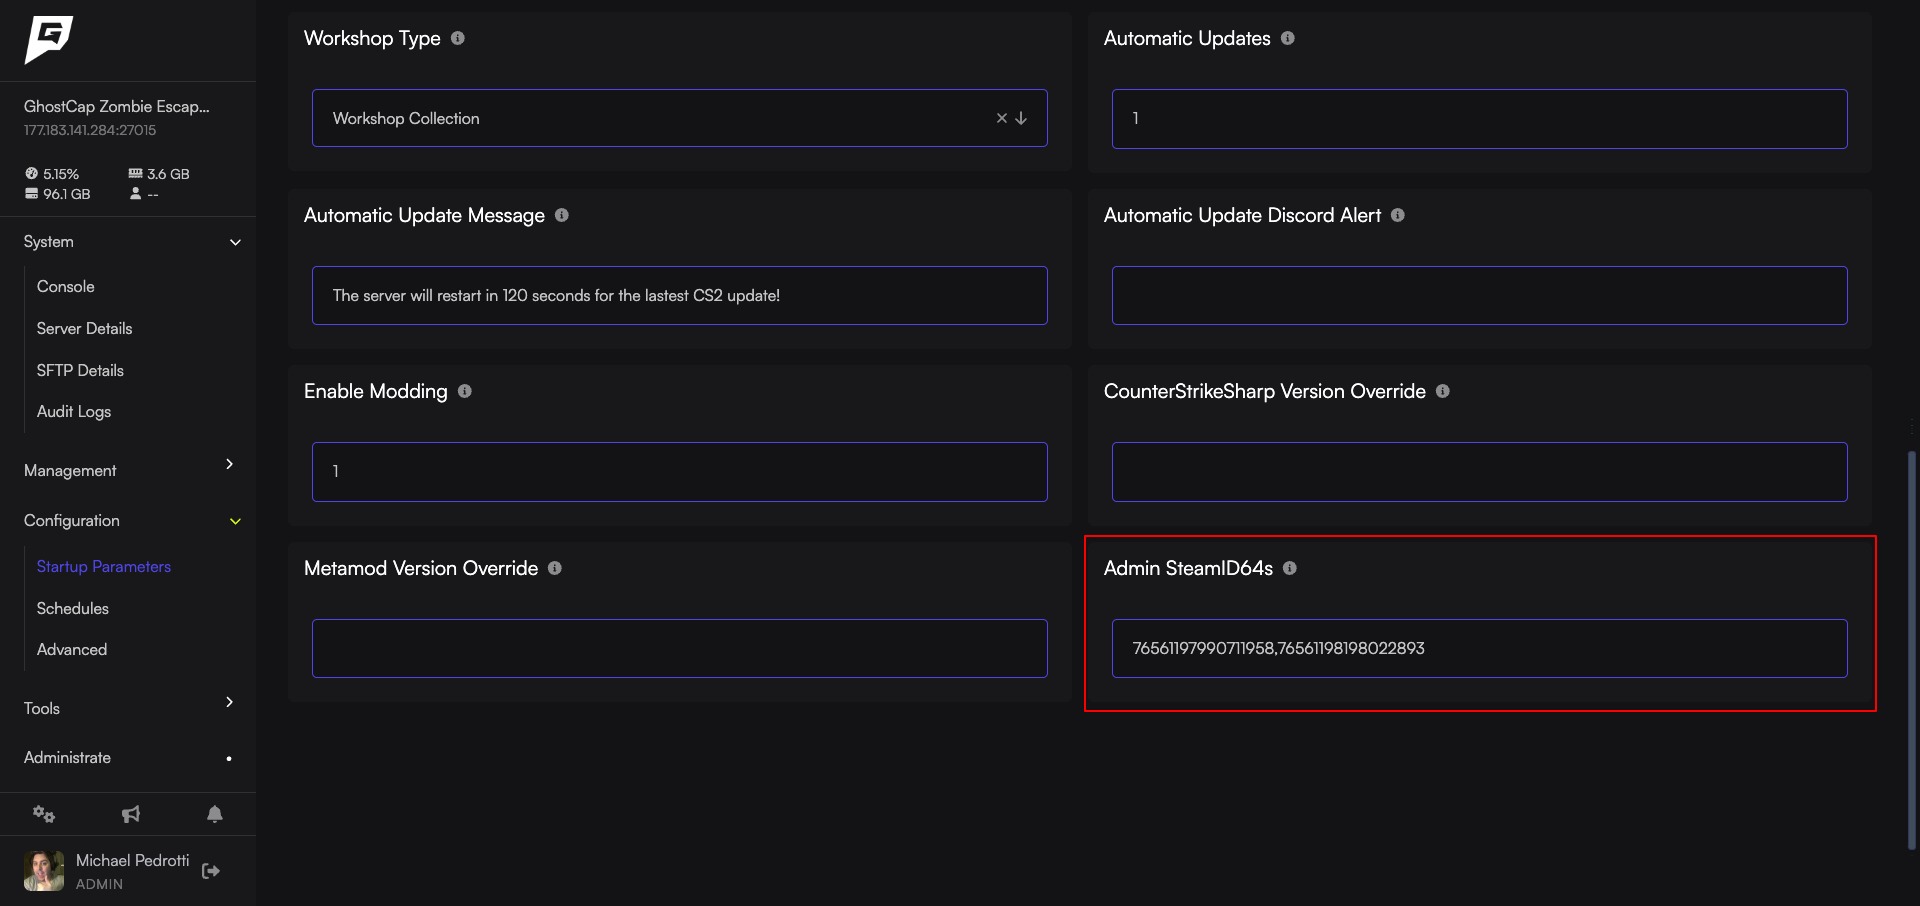
Admin SteamID64sand paste your ID there. - 7Click
Save & Restartto apply your changes.
You can add multiple admins by adding a comma between each SteamID64, like this: 76561197990711958,76561198034202275
Note
You cannot manually edit admins.json using this method. You can add custom flags to admin_groups.json if needed for specific plugins. Please see the Advanced Settings below if you need to set up custom permissions.
Now you can install an admin management plugin such as CS2 Simple Admin, and it will work out of the box.
Advanced Settings
If you would rather manually edit your admins.json and admin_groups.json for multiple groups or fine control over admins, you will need to leave Admin SteamID64s blank. Doing this means our Game Panel will no longer edit these files at all (other than renaming admin_groups.example.json to admin_groups.json once).
Editing admins.json: https://docs.cssharp.dev/docs/admin-framework/defining-admins.html Editing admin_groups.json:: https://docs.cssharp.dev/docs/admin-framework/defining-admin-groups.html